For those getting started with spey casting and really for just about everyone for that matter, it is a very good idea to practice spey casting on the grass or turf. Why?
Casting on the grass is convenient. Most everyone has grass nearby. It may be your lawn, a park or a nearby school. For most people the grass in closer that a river. The more often you practice the quicker you will become an accomplished spey caster. Is it better than practicing on the water? In some ways yes.
First of all you must have a “Grass Leader” to practice on the grass or turf. (See Below). The “Grass Leader” grabs the grass and will give you “Line Stick”. Without the “Line Stick” you will not have an “Anchor”. Does it grab like water? No, but it is good enough for practicing. A grass leader is tied up using 9-10 inch pieces of monofilament tippet material that is about .025″ – .030″ in diameter. When tied up using blood knots you will have knots about every 5 inches. This grabs the grass.
Another great thing about casting on grass is that you can stop your cast at any time mid cast to check line positioning. Rod path and subsequent line positioning are the keys to making a spey cast. Is my anchor in the right place? Is the “D-loop lined up correctly (180 degree rule)? Concentrate on;
- The correct rod path for the various spey casts.
- Work on smooth application of power.
- Quiet your top hand and come to a firm stop on the forward cast.
- Be aware of the use of the bottom hand it’s what starts the forward cast.
Grass is less distracting, you are not fishing! You are casting! . Pay attention to the details and get it right.
The “On Shoulder” Casts that you should practice are ;
- Switch Cast
- Single Spey
- Double Spey
- Circle cast
- Snap T
The “Off Shoulder” or “Cack-Handed” casts you should practice are;
- Reverse Single Spey
- Reverse Double Spey
- Reverse Circle Cast
- Reverse Snap T
Practice may not make perfect, but it certainly makes you better.
Constructing a Grass Leader

To make a grass leader you will need some .025 to 0.30 tippet material or “Maxima”.
- Cut 9-10 inch pieces of the mono-filament material. You will need about 20 – 24 – 9″ -10″ long pieces
- Tie the 9-10 inch pieces together using blood knots. You will get real good at tying them! You only need 3 turns on each side tag of the blood knot when you are tying them.
- Cut the tags to approximately 1/2″ to 5/8″ long. This will grab the grass barbules.
- The grass leader wants to be approximately 10’to 12′ long.
- Cut one last piece of mono-filament about 18″ long and tie it to one end of the grass leader. This will be what will attach to the integrated fly line or shooting head.
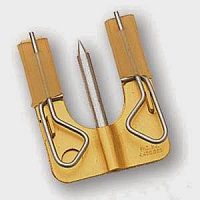
Blood Knot

Believe me, you will get very good at tying “Blood Knots” when you are finished tying up a grass leader. It will take about 20 or more separate knots.