I’ve been helping a new fishing buddy, Mark Ruef, repair his drift boat. It is an older Clackacraft that he picked up for about $1200, including a trailer that is in good working condition. A pretty good deal I thought until I took a good look at it. When I asked Mark how much he’d paid for it I said, “Do you think you might be better selling this and getting a better boat?”
The interior of the boat had been repaired with a big patch of fiberglass and epoxy. The previous owner didn’t prep the surface correctly and the fiberglass had detached and water and grime had gotten underneath it. The interior sides and bottom had been painted by what looked like a 2 year old. Again, no prep and the paint was peeling in a lot of spots. The rower’s seat and storage boxes were also re-painted and the paint was flaking off. So all the painted areas had to be prepped for new paint. The floor area had to be stripped down to the original bottom and re-done. A lot of work to say the least.
Mark dropped the boat off at my shop and we started working on it on weekends and evenings when he had the time. It was just roll up your sleeves and start sanding and grinding the surfaces to get back to solid surfaces.
The Bottom.
- To prep the bottom we used a 4″ angle grinder with segmented sandpaper, I always referred to these disks as floppy disks. We used 60 grit disks and ground away all the bad fiberglass and epoxy.
- Once all the loose material was ground down we had to get the entire surface sanded to accept new fiberglass and then paint. I decided to run a 6″ wide strip of bi-axial fiberglass tape at the junction of the bottom to the sides the interior chine. The bi-axial tape is saturated with epoxy and then put in place and smoothed out with a squeegee and a brush.
- There were two metal brackets for the rower’s footrest had to be reattached with layers of bi-axial tape and then additional fiberglass cloth, all saturated and applied with epoxy.
- Once the fiberglass had hardened the epoxy and glass had to be sanded with 60 grit sandpaper had prep in for the finish bottom paint.
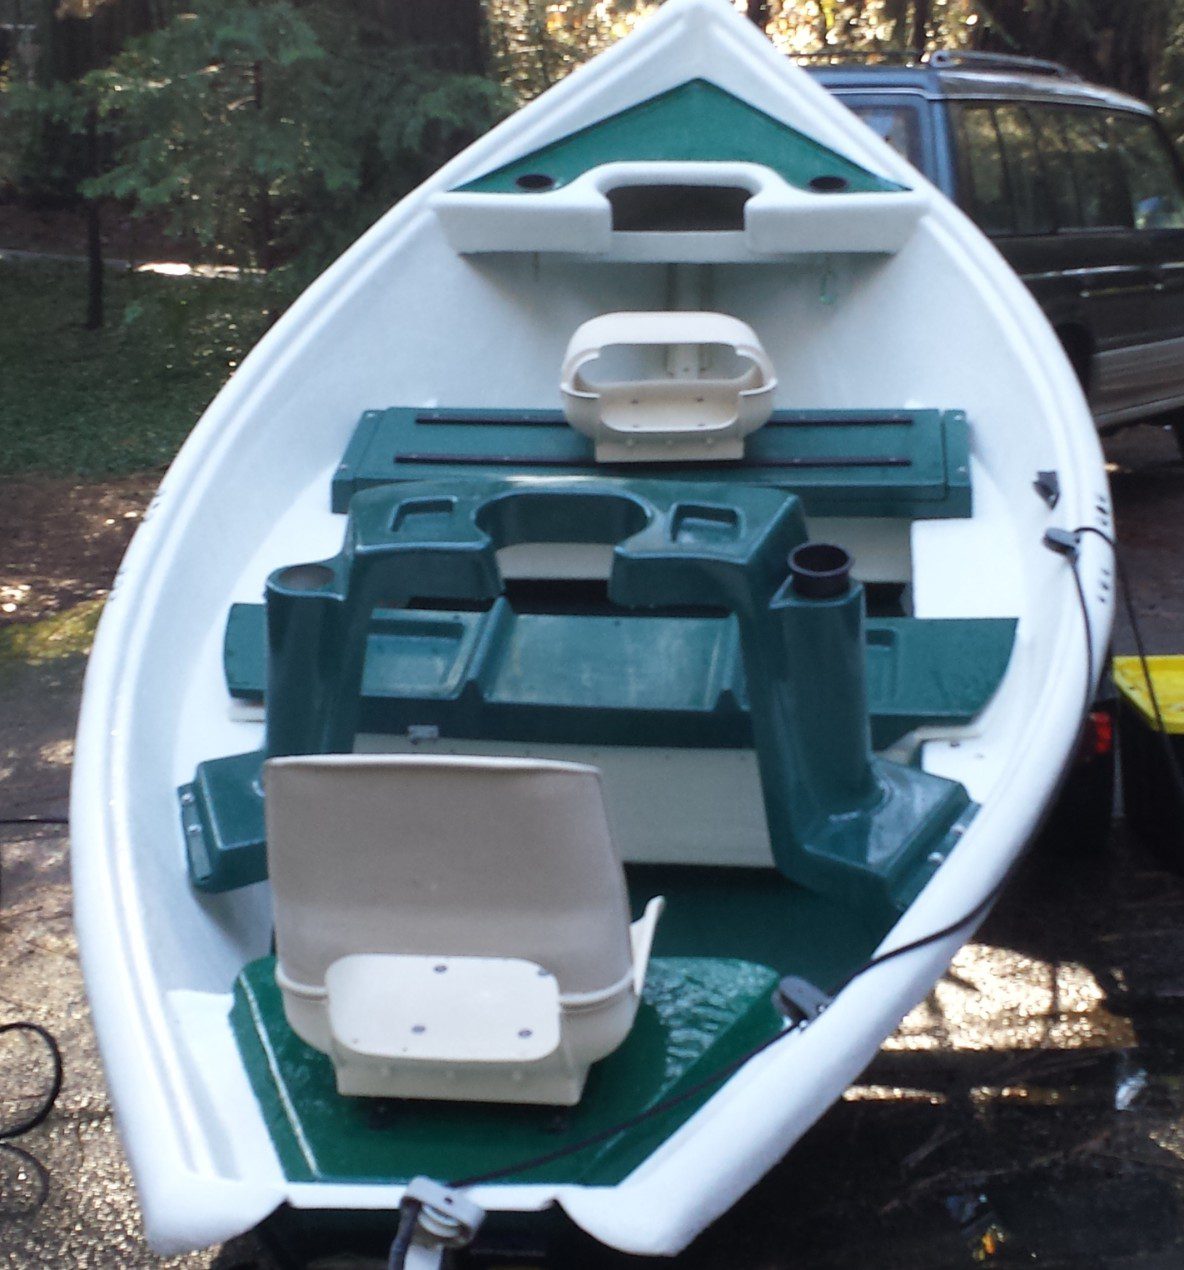
- We used a truck bed liner called “Durabak 18” for the bottom. This product has small pieces of hard rubber, mixed into it to give the finished product a non-slip surface. The bottom took two coats applied in different directions with a special roller provided by Durabak. The bottom is a dark green color.
The Interior Sides
- The sides, front deck and rear deck needed resurfacing, mainly from a bad paint job. This means bad prep and sloppy painting by the previous owner. There were a few spots with exposed fiberglass that needed to be reinforced with fiberglass and epoxy.
- The first step was sanding with an orbital sander using 80 grit discs. This went pretty quickly.
- We vacuumed all the surfaces and wiped them down with acetone to etch and get the fine dust off.
- We masked off the line where the sides met the bottom along with any other parts that were not going to be painted.
- The color that was selected was an off-white. We used “Raptor” bed liner which is a urethane paint. It has a hardener that is mixed into it along with a paint tint. The paint is an automotive paint. The ratio is 4 parts Urethane base, 1 part hardener, and 1/8 part paint.
- We elected to roll the material on with a 3/8″ nap roller. This ended up being the perfect choice for the boat. The material can be sprayed.
- The “Raptor” bedliner took one solid coat and then a light second coat to cover.
- This turned out perfect, and I do mean perfect!
Misc. Parts

- The casting brace, rowers seat and the front seat needed to be re-painted. We elected to paint these parts with an urethane auto paint. We matched the original green of the casting brace.
- The rowers seat had badly flaking paint so after a failed attempt to sand and paint it we had to use paint stripper to get down to the original base layer. Once stripped it was sanded with 160 grit paper and then painted.
- We used a “Pre-Val” paint gun which is essentially a rattle can sprayer. It has a glass jar to hold the paint and an spray unit that screws on top of the jar. It delivers paint in a sort of mist that you apply very slowly. it worked great. The “Pre-Val” unit runs about $14 and extra spray heads run $6 each. We used 2 extra spray heads.
The boat has turned about as good as could be expected by two amateurs, probably in some ways better than new. But I guess that’s a biased opinion after all the hard work