10 & 2 are a Little Too Late

“10 and 2 is too little too late” – As we have heard from the beginning of our fly casting learning curve, our cast is to be imagined as if your rod moves along an imaginary clock face, with the forward cast stopping at 10 o’clock, and the backcast stopping at 2 o’clock.

In reality, when we start casting, we are pretty much oblivious to this imaginary clock. It is advised to instead change the time zones to one o’clock on the backcast.

If you try changing your way of thinking to “10 to 1” you may have better luck.

Let the Current do the Dirty Work

When wading on the Lower Yuba and nymphing with indicators and multiple shot, banging out false casts with a nymphing rigg can lead to more time spent untangling than fishing.

Nuts & Bolts: Water Load Casting a Deep Nymphing Rigg

When nymphing from a drift boat you are typically casting multiple flies with shot. On the Lower Yuba River which often has good water clarity you also need to add the element of stealth. This means that you often need to be able to cast your nymphing rigg at least 2 rod lengths and more from the boat. This may seem daunting to some. By using a water loading casting technique you will be able to improve your ability to achieve these distances with less tangling when casting shot and multiple flies. We were fishing one day and my son Zack looked at me with a huge smile and a tangled mess of tippet and flies and said, “Look dad, I’ve got a bigger rat’s nest then grandpa.” Using a water load cast can help this from happening.

First I’ll describe an indicator rigg setup that has been successful for me on the Lower Yuba River, the Lower Sacramento River, the Klamath River and many rivers in Montana when side drifting from a drift boat or raft.

Indicator Setup

Thingamabobber_packagingIt seems like the indicator that I mostly reach for these days is the thingamabobber. It just does the trick easily.


Boles_IndicatorWhen I want to really know where my flies are drifting under my indicator I’ll go to the “Boles Float Right”.

(a) For most side drifting from a boat I will typically rigg up with an indicator and about 6’ to 9’ of tippet from the indicator to the shot depending on the depth of the run.

(b) I usually rigg up with a tapered 2x x 10’ leader. I prefer to use the tapered leader so I can adjust depth easily.

(c) On the Lower Yuba River and the Lower Sacramento River we have been using a “Thingamabobber”, large size, white color. On drop offs and areas that have changing current speed and depth I prefer a “Boles” indicator in blue or green. The flag on the “Boles” allows you to see where your flies are underneath your indicator and will tell you to;

(1) Either raise or lower the indicator
(2) Mend to speed up or slow down the drift, or
(3) Add or take off shot.

Usually I will choose one or the other and stick with it throughout the day.

Fly Rigging

I’ll run three flies under the indicator, each spaced from 12″ to 18″. The deeper the run the larger the spacing. I use 3x fluorocarbon from the shot to the 1st fly, 4x fluorocarbon from the 1st to the 2nd fly and either 4x or 5x fluorocarbon from the 2nd to the third fly depending on the size of the fly.

Presentation

I believe that the Yuba requires stealth with your presentation and the set-ups for your drift. I usually try to cast my indicator into the desired seam with the length of the cast to be at least 2 rod lengths (18 to 20 feet) from the boat and a lot of times even further than that, closer to 3 rod lengths. (2o to 30 feet). I use a 6 weight 9’6″ Sage XP or Z-Axis and it does just fine. Keep mending as required to keep the indicator moving in a straight line downstream.

Water Load Casting Technique

Water Load Casting – When fishing from a drift boat there is typically little concern for getting caught up when backcasting. This does not mean you shouldn’t “look” first. The best technique for delivering the indicator, shot and flies and if there are not obstructions for your backcast is to water load your back cast prior to your forward cast.

Back Cast – To set up your backcast. You need to think of the mantra, Lift, Look and Launch.

By repeating this mantra you are reminding yourself to;

(1) Lift – Strip your indicator and flies towards the boat and lift the flies out of the water column until you see them up on the surface and then in one fluid motion;

(2) Look – Take a quick look at the back side to see there are no obstructions behind you.

(3) Launch – Lift the indicator and flies out of the water and start you backcast aiming your rod tip over your shoulder.

The cast should be overhead not side arm (parallel to the water). Think of your rod tip as a paint brush and you are painting the ceiling with it. This is another mantra that come in handy (Paint the Ceiling). Continue with your rod tip and point to landing spot on the backcast. Let the indicator and flies come to rest on the water on the backcast.

Forward Cast – before your flies sink behind you repeat the mantra;

(1) Lift – Lift the flies back off the water before they sink to water load the forward cast;

(2) Look – Where you want your flies and indicator to land which will be the seam that you want to fish;

(3) Launch – Start your forward cast over your head just to the side of vertical

Remember to (Paint the Ceiling) with your rod tip on the forward cast over your head or just to the side of vertical.

Deliver the flies and drop your rod tip, make a mend for a dead drift and you’re fishin’.

Summary

Done! Whew. Not as hard as it may sound.

Using this technique will keep your flies from dropping and forming a tailing loop and will eliminate constant tangles with indicator and flies.

Roll Casting for Sucess

It seems like the roll cast is used so often, whether you fishing with bushes behind you, doing a roll pickup to re-deliver a dry fly or re-casting a nymph rigg when you’re drifting down the river in a boat, that it should be on the top of everyone’s list to practice and master. So basic and such an important technique to have at your call when you need it.

I’ll never forget the casting video with Mel Kreiger, when he explains that the delivery stroke/snap when making a roll cast is like cutting of the head of a chicken with a hatchet. If you’ve seen it, you’ll know what I mean.

Once you start using the roll cast you’ll notice that you use it more often than you realize. That’s the key it should be second nature, something you don’t have to think about.

The roll cast has two big advantages.

(1) it is a more stealthy cast as opposed to false casting over rising fish

(2) It enables you to present a cast with obstacles directly behind you like, willows, brush or a peanut gallery of people watching you, hopefully people that aren’t laughing at you.

What are the keys to making a good roll cast?

After pointing your rod at the flys strip in excess line until you are tight to your flies. Gradually accelerate the rod backwards, drawing the line and flies towards you to build up speed and resistance. As the rod tip and the line moves behind your shoulder, raise the tip up to a 1:00 position with your hand ending up by your ear.

(1) Stop the Rod at that position

(2) Change Direction and cast forward to your target looking through your thumb at the target.

(3) Unfurl the cast to the targeted area.

Sounds easy, but there are a few common mistakes that we are all guilty of from time to time, such as;

Starting the roll cast with too much loose line on the water. The rod tip is pointed straight up at the sky and in the wrong position to load properly.

Things to Remember

(1) Retrieve the rod tip from a low position and keep noticeable tension on the line as it slices through the current.

(2) With this motion and when the time is right, lift the rod tip skyward

(3) Snap the rod forward and unfurling the line to your target.

Practice this stroke and get it down and you won’t be sorry that you spent the extra time.. The roll cast has two big advantages,

(1) it is a more stealthy cast as opposed to false casting over rising fish

(2) It enables you to present a cast with obstacles directly behind you like, willows, brush or a peanut gallery of people watching you, hopefully people that aren’t laughing at you.

What are the keys to making a good roll cast?.

After pointing your rod at the flys strip in excess line until you are tight to your flies. Gradually accelerate the rod backwards, drawing the line and flies towards you to build up speed and resistance. As the rod tip and the line moves behind your shoulder, raise the tip up to a 1:00 position with your hand ending up by your ear.

(1) Stop the Rod at that position

(2) Change Direction and cast forward to your target looking through your thumb at the target.

(3) Unfurl the cast to the targeted area.

Sounds easy, but there are a few common mistakes that we are all guilty of from time to time, such as;

Starting the roll cast with too much loose line on the water. The rod tip is pointed straight up at the sky and in the wrong position to load properly.

Things to Remember

(1) Retrieve the rod tip from a low position and keep noticeable tension on the line as it slices through the current.

(2) With this motion and when the time is right, lift the rod tip skyward

(3) Snap the rod forward and unfurling the line to your target.

Practice this stroke and get it down and you won’t be sorry that you spent the extra time.

Casting Practice: The Wiggle Cast

As I’ve stated before, I’ve always been a fan of Dave Hughes, his books introduced me to two casting techniques, the wiggle cast and the reach cast. By adding these two casts to your game you can just about present a dry fly, emerger or dry dropper combination in any situation. If you get a handle on these two techniques and combine them with a reach wiggle you’ll really have something going.

I’m going to go over the essence of the wiggle cast here.

The “wiggle” cast is also referred to as the “serpentine” cast, or a “S” cast. I learned it as the wiggle, so I’ll stick with it. As they say, “That’s my story and I’m stickin’ to it”.

The essence of the cast is to place several coils or wiggles in the line as you complete the forward cast. Once accomplished, during the precious seconds that it takes for the complex currents to work the coils out of the line, your fly will have extra drag free drift while in the targeted zone. If you add a reach mend to the wiggle you’ll get even more time in the zone.

As with many other casting tips, the line always follows the motion of the rod tip and it applies to the wiggle cast. When delivering the cast simply wiggle the rod tip sideways back and forth. The quicker you start the wiggle after the stop of the rod and beginning the drift forward to the target, the closer the wiggles will be to the end of your fly line. This is what you are shooting for.

If your wiggles do not reach the tip of the fly line, the best thing to do is to practice on the lawn, work on the timing until you get it down. It just takes practice.

Putting the Wiggle to use on the River

When on the river and putting the wiggle cast into practice, the cast works well when casting upstream or quartering upstream, but is a very serviceable cast at almost any angle.

The upstream wiggle cast requires establishing a position either straight across or off to the side of the targeted fish. The closer you can stealthily wade to get into position within reason the better, thirty or forty feet is desirable. Make a normal cast targeting a spot two to four or five feet above the targeted fish. While the loop of the cast lays out reach lay your rod over upstream, the reach cast, and at the same wiggle the rod tip briskly to add the serpentine colis to the line as it lands. This is the reach wiggle cast.

The downstream wiggle cast is a great technique to add to your arsenal. The downstream wiggle cast calls for a casting position anywhere from an arc of 30 to 60 degrees upstream from the trout. Don’t position yourself so that you are directly upstream from a working trout. You may get away with it one time but then you’ll be done. Pick up the cast one time and the fish will be headed downstream like a freight train. Stay to the side.

Make measuring forecasts well of to the side. You’ll need to add extra line into your cast to make up for the wiggle and reach of your presentation cast. Aim your cast two to five feet above the position of the targeted fish and wiggle your rod tip briskly while the line loop unfolds. That should give you a nice drag free drift for your presentation.

Summary

Get out on the lawn, work on this and you will have success on the water. Tie the wiggle/reach cast to the tactics of stealthy wading and wading into the correct position to present your fly, and you will have trout dancing on your line.

“I guarantee it”.

Casting Tip: Applied Power – Too Much, Too Soon

I just started helping a local high school teach their students the art of fly casting. Many casting errors are traced to these two main causes, breaking the wrist and incorrectly applied power at the pickup of the line off the water and in this case the grass.

We’ll concentrate on the second problem here. Many anglers start their cast by picking up the line with their rod parallel to the water and then applying too much power, with too much slack line on the water. This creates an extremely large loop and will not load the rod properly. The angler spends the rest of the cast sequence trying to tighten up the loop. Bad start equals bad delivery in most cases.

The cure of this malady is to begin the cast by stripping in excess line, and then smoothly lifting the rod tip to 10:00, not 1:00. This sets the rod up for a short, quick power stroke.

Try this next time you’re on the water and you’ll see a difference.

Bounce Nymphing

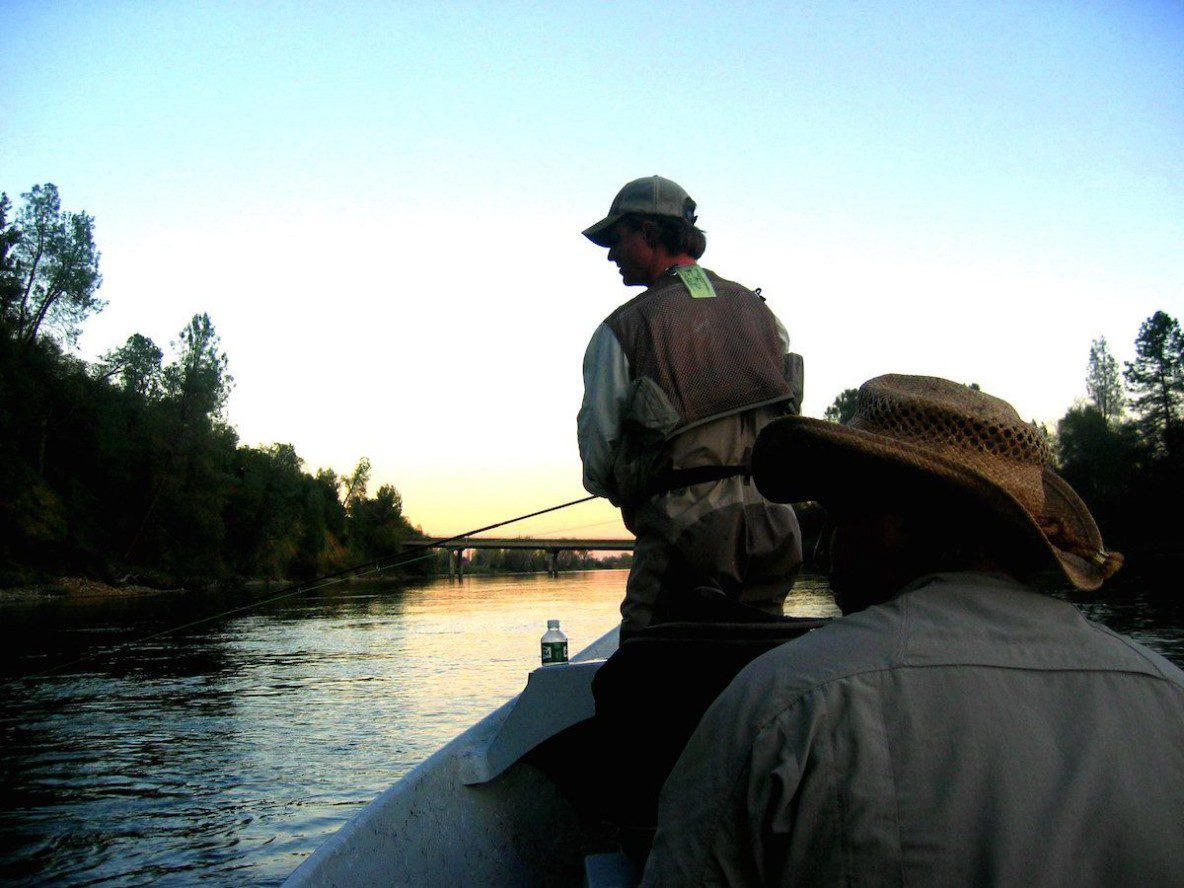
“Bounce Nymphing” is another technique that will enable you to keep in contact with the bottom and keep a tight line to your flies. The rigging method is a variation of a tight line rigging method. I have a friend, John, who I fished the Upper Sacramento River with, and I watched as he vacuumed a run right in front of my eyes. He was using a very tight line and kept most of his fly line off the water. As I’ve since discovered he was “Bounce Nymphing”.

I came across an article in “Fly Fisherman” magazine, written by Larry Tullis. I’ll give you a dose of his medicine.

Bounce Nymphing

Bounce_Nymphing_MendingAny of us that have spent any time nymphing know that trout feed subsurface most of the time. In streams and rivers the bugs drift along in the current and are gobbled up by trout waiting for food to come to them.

Most of this “nymphing” occurs in the lower third of the water column. Of all of the myriad of nymphing rigs and techniques to catch these deep-feeding trout none is more productive than the uncommon method Larry Tullis has called “Bounce Nymphing”. This nymphing style keeps the flies suspended close to the bottom, at nose level to the trout, much longer than regular nymphing.

“Bounce Nymphing” is said to have originated in Utah by Provo River anglers to describe their technique of fishing nymphs on a spin or fly rod with monofilament line and a spinning reel. Larry Tullis experimented and adapted this method’s best traits to fly-fishing tackle, and it’s now his favorite nymphing system. It is a recommended method for guides to use with beginning fly fishers to help them catch fish. More experienced anglers have started to use the method regularly because they recognize its advantages. “Bounce Nymphing” with small nymph imitations is especially good for selective fish in heavily fished waters, but this technique works in most places and with most nymphs.

Bounce Advantages

When fishing using slack-line nymphing methods, typically with indicators and shot, the fly:

(1) Takes a long time to get into the strike zone near the stream bottom.

(2) Sinks, and it is near the bottom only a short time before it swings up at the end of the drift.

(3) Hangs up on the bottom when you use heavy weights to overcome these problems.

High Stick Nymphing

When you use High Stick Nymphing methods;

(1) High-stick nymphing keeps little slack in the system.

(2) You can keep the nymphs at the right level and detect strikes quickly, but you can’t fish effectively at long distances.

(3) Drifts are short, so this works only in swift, shallow water where you can approach the fish closely.

(4) The slight tension on the line common in high-stick nymphing sometimes discourages selectively feeding trout.

Bounce Nymphing

When you are using the “Bounce Nymphing” method;

(1) The weight is on the end of the leader with two short droppers above. This keeps the flies suspended just off the bottom and slows the flies to more closely match the speed of the naturals in the slower water near the stream bottom.

(2) The “Bounce Nymphing” method keeps the flies near the bottom two to three times longer than other nymphing techniques because the flies sink quickly and don’t “ride up” until the very end of the drift.

(3) Because there is no hook on the end of the leader, this rig also reduces the number of stream-bottom hang-ups. Several small split-shot in a row, rather than one large split-shot reduces the likelihood of the weight wedging between rocks and makes weight adjustment easier. Tie an overhand knot on the end of the leader to keep the weights from slipping off.

Rigging for the “Bounce Nymphing” Method

(1) The distance between your buoyant foam or yarn strike indicator and the bottom weights should be about three times the water depth.You can fish a bounce-nymph rig without a strike indicator, but it works better with one as visual reference.

(2) It is recommended to use leaders from 8 to 16 feet long.

(3) Start with a 7-foot tapered leader and add 3 to 9 feet of 3X to 6X tippet. The long, thin monofilament allows the nymphs to sink faster and stay down without being pushed upward by the current. Use as light a tippet as possible given the size of the flies, the water conditions, and the size of fish you expect to catch.

(4) Place the droppers 6 to 12 inches apart and keep them short (2 to 5 inches) to help avoid tangles. The bottom dropper should be about 6 to 12 inches above the weights. To make a dropper, connect two tippet sections using a double surgeon’s knot or blood knot. Clip the upper tag end and leave the lower tag end long enough to attach the fly.

“Bounce Nymphing” Technique and Tactics

Bounce_Nymphing_Cast_and_MendThe “Bounce Nymphing” rig is designed to drift with a tight line between the weights and the strike indicator and a slack line between your rod tip and the strike indicator.

This gives you the advantages of both slack-line and tight-line nymphing. The taut portion drifts more slowly than the surface currents because of the weights dragging and bouncing along the bottom. This taut section transmits strikes better than standard nymphing rigs where there is often slack between the flies and the indicator.

Bounce_Bynphing_RiggThe indicator bounces and twitches as the weights negotiate along the stream bottom, but the rig should not hang on the bottom if you use the right amount of weight. The flies should not drag on the bottom; they should drift suspended 2 to 12 inches above the stream bottom, so do not use weighted flies.

For “Bounce Nymphing”, it is recommended to use a 9-foot, 4- or 5-weight rod with a clean and conditioned floating line. Lighter lines are great if you can cast them with weight. Heavier rods and lines cast weights better, but the stiffness and water resistance of heavier lines reduces their effectiveness at achieving a natural drift.

I personally have fished the method using a 9’6″, 6 weight with a 4 weight line. and have seen people use as light as 2 weight lines.

Rigging a “Bounce Nymphing Rigg”

(a) Indicator

(b) Tie the fly to the tag end of the tippet knot about 2″ to 5″ long

(c) Tie the second tag end for the second fly 6″ to 12″ apart.

(d) Tie the weights 6’ to 12″ below the last fly

(e) Tie a double overhead knot and place the shot above the knot

Casting the “Bounce Nymphing” Rigg

The most important thing to remember is that you don’t cast the fly line so much as lob the indicator and flies, keeping a wide-open loop. If you try casting this rigg with a tight loop you will constantly be tangled up.

It is essential to start the cast with no slack line between the rod tip and the weight. If you have slack in your system, strip in line or allow the current to pull the line tight to eliminate the slack before you cast. Using water tension to help load the rod, you can often cast the flies from downstream to your target in one smooth stroke.

If you must false-cast to lengthen your distance, wait at the end of each stroke for the leader to straighten and the weights reach to the end of their trajectory before you start the next stroke. A tight loop with a sudden stop will cause tangles and you will spend more time unraveling the mess than fishing. Work on developing gradual stops and starts for an overall smoother cast and fewer tangles.

The most common presentation is often to cast up- and across-stream and drift the flies down to below where you are positioned.

You can cast straight upstream with slack between the rod tip and the indicator so the line does not pull the indicator in any unnatural direction. This requires steady line control.

It is a good idea to try to keep the indicator downstream of the flies. This keeps the line tight between your indicator and flies and helps instantly transmit any strikes. The indicator twitches and jerks as the weights bounce along the bottom, so don’t set the hook until the indicator stops or you see something else unusual. Often, the tight line and tension from the indicator causes the trout to hook itself.

In fast or deep water use a tuck cast to sink the nymphs to the bottom faster. Combine the tuck cast with a reach mend for the perfect drift. Mend the line upstream to introduce more slack or eliminate a downstream belly of line that may pull the indicator downstream too quickly.

When you make a full mend to the indicator, follow it by wiggling out more slack line for a longer drift. When the indicator is downstream, you can also lower your rod tip and wiggle out extra line to extend your drift. Add a small downstream belly to your line if you want to speed up a drift that is dragging on the bottom too much.

Summary

“Bounce Nymphing” is not intended to replace other nymphing methods. It’s just another effective tactic to add to your all around game. “Bounce Nymphing” works best in gravel runs, riffles, and troughs to about six feet deep with moderate to fast currents. Slow currents make it more difficult to get a good bounce going but it works fine if you downsize your weights and strike indicator.